

|
|
Venting a green is the ability of air to flow down underneath the green by using drain lines. When installing drainage in the subsurface of the green cavity, have a few drain lines brought to the finished grade on the outside of the green. By having air move freely through these openings, will be a benefit to the green. Oxygen will move out any carbon dioxide (gaseous exchange) that is trapped beneath, which is harmful to turfs roots and the microbial populations. Also, you can block all the openings at the surface except one, and then pump air in (summer time) to force more oxygen to the turf roots Unfortunately I had to do this construction procedure a few years after my green was built, because thats when I learned of the benefits of venting a green It was a effort to get it installed, but well worth it. With my green being so small, the plan was to install two air vents. I would use the back lateral drain line and the front drain line to attach these air vents. Doing this will create an air flow through the drain lines like opening up windows in a basement. |
 |
Left: Removed rough sod from infront of the green. I will dig down and expose the main drain line. Right: Dug a big area in which to work in. |
 |

 |
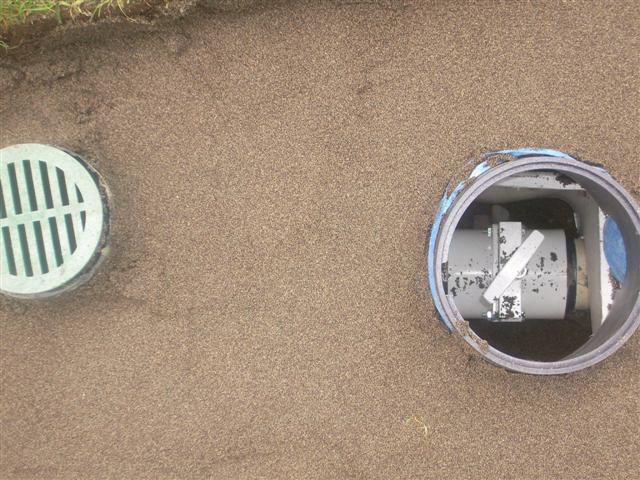
Left: I have attached the 4 way fitting onto the drain line. I will be adding another length of 4 pipe from the fitting to the surface. Also, in behind the fitting you can see a white plunger valve. This will allow me to shut off the main drain line, and then I can flood my green. Once the green has reached the saturation point, I open up the valve releasing the water and flushing the green. Right: Back filling with sand around the air vent (on the left) and the plunger valve (on the right). |
 |
 |
Left: All the rough sod has been put back to finish this part of the project. I worked in some Rye seed into the scarred areas and in time it will return back to a thick canopy of turf. Right: This air vent was going to be more work because I had to remove three different sod heights. Bottom of picture is putting green height 1/8, middle was collar height 1/2 and rough height 2. |
 |
 |
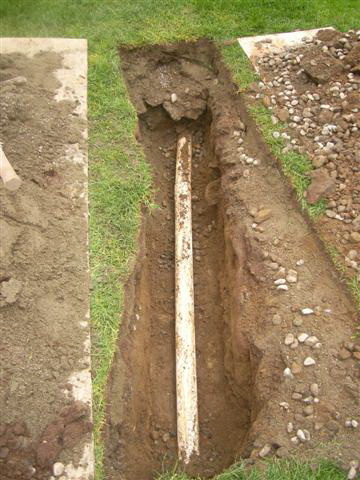
Left: You can see the pea stone layer and the root zone mix. The root zone has grown from its original 12 from all the topdressing of the past few years. Right: Drain line has been found and a 4 length of pipe has been added to reach the outside of the green. At the end of the pipe a 90o fitting was put on, then a small length added and brought to the surface. |
 |
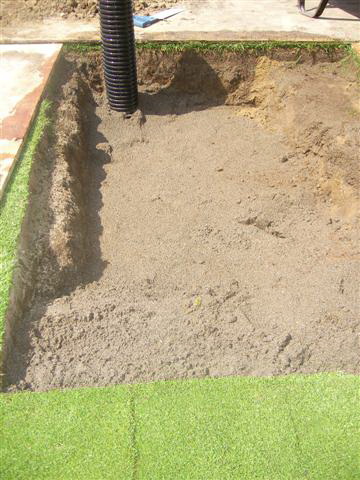 |
Left: Back filling with sand is almost complete. Putting green sod was installed first. (bottom of pic) Right: Everything has been buttoned up and the second air vent looks good in the rough. |
 |